In website development and customization, the footer in WordPress websites is frequently underestimated despite its pivotal role. It serves as a cornerstone for professionalism, branding, and functionality on your site. In 2025, understanding how to edit your WordPress footer efficiently is essential for maintaining brand consistency and enhancing user experience.
This guide will navigate you through the process, ensuring your footer aligns seamlessly with your brand identity while providing valuable resources for visitors. By optimizing this often overlooked section, you can elevate the overall aesthetic appeal and usability of your WordPress websites, making it more engaging and user-friendly for visitors in the digital landscape of 2025.
What Is A WordPress Footer?
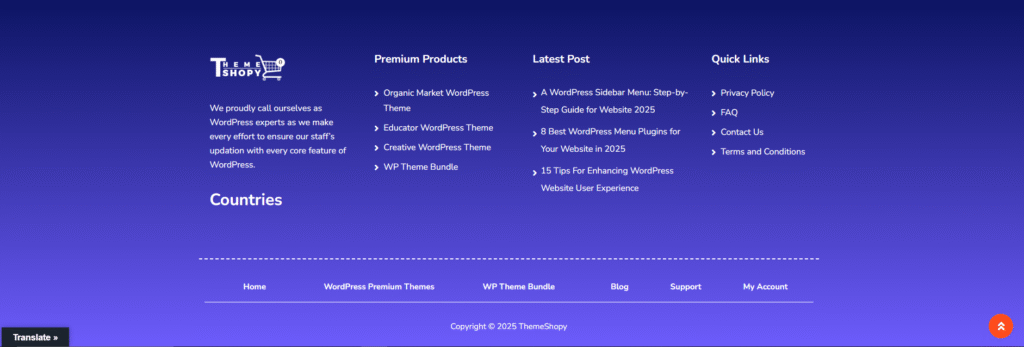
The footer in WordPress is the bottom section of every webpage on a WordPress. It serves as a repository for crucial information, including copyright notices, links to privacy policies and terms of service, contact details, social media icons, and sometimes supplementary navigation menus. This often overlooked area provides website owners with an opportunity to customize their site’s appearance and functionality, enhancing user experience and reinforcing brand identity.
By customize footer in WordPress websites, owners can tailor their sites to meet specific needs, such as providing additional resources for visitors or integrating branding elements. In essence, the footer in WordPress websites acts as a foundational component of a website, offering a space for essential information and tools that contribute to the overall usability and professionalism of the site.
5 Ways To Edit the Footer in WordPress Websites:
The footer of your WordPress website might seem like a small detail, but it plays a crucial role in user experience, branding, and even SEO. Whether you want to update copyright text, add useful links, include contact info, or integrate social media icons, customizing the footer gives your site a polished and professional finish. Luckily, WordPress offers multiple ways to edit the footer both with and without coding. In this section, we’ll explore five practical methods to modify your WordPress footer based on your comfort level and site needs.
1. Edit the Footer With WordPress Theme Customizer:
- Access the Theme Customizer: Log in to your WordPress dashboard. On the left-hand side menu, hover over “Appearance” and then click on “Customize”.
- Navigate to Footer Settings: Once you’re in the Theme Customizer, look for the section related to footer settings. This might be labeled differently depending on your theme, but it’s usually found under “Footer” or “Footer Settings”.
- Modify Text, Colors, and Layouts: Within the footer settings section, you’ll find options to customize various aspects such as text, colors, and layouts. You can typically change the text displayed in the footer, adjust the colors to match your website’s theme, and select different layout options for the footer section.
- Add Custom Code (if necessary): Some themes allow you to add custom HTML, CSS, or JavaScript code directly into the footer. If you need to add custom code for tracking scripts, additional styling, or integrating third-party tools, look for an option to insert custom code within the footer settings.
- Preview and Publish Changes: As you make modifications to the footer settings, the changes will be reflected in the live preview of your website within the Theme Customizer. Take this opportunity to preview how the changes will appear on your website. Once you’re satisfied with the edits, click the “Publish” button to make the changes live on your website.
By following these steps, you can easily customize the footer in WordPress websites using the built-in Theme Customizer, ensuring it aligns with your branding and serves your visitors effectively.
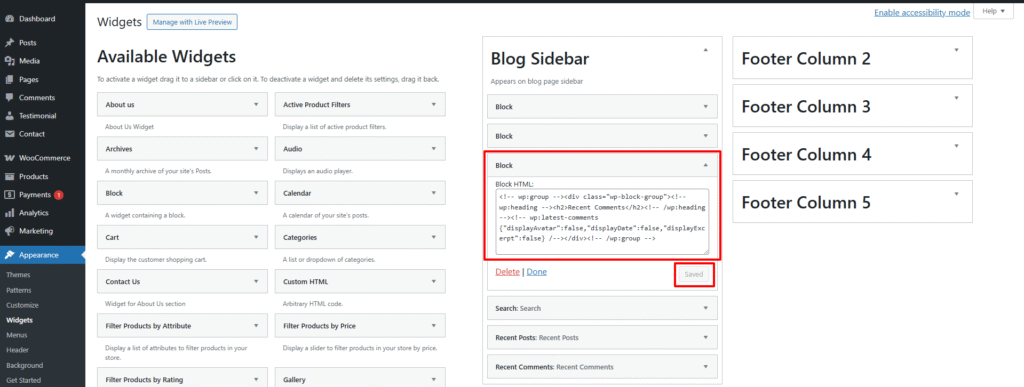
2. Add Widgets To Your WordPress Footer:
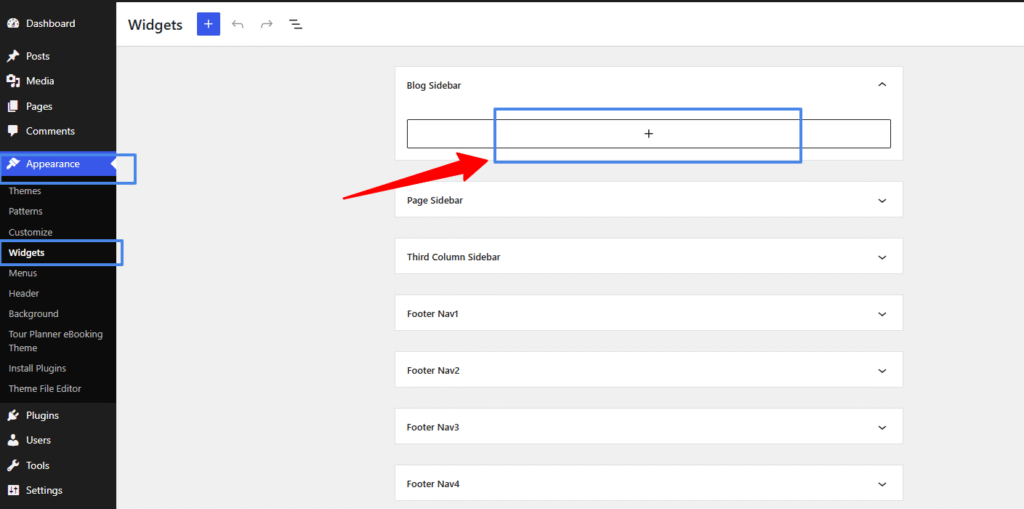
- Access the Widgets Area: Log in to your WordPress dashboard and navigate to “Appearance” > “Widgets“.
- Locate the Footer Widget Area: In the Widgets screen, look for the widgetized area specifically designated for the footer. This area may be labeled as “Footer” or “Footer Widgets”.
- Choose a Widget: From the list of available widgets on the left side of the screen, select the widget you want to add to your footer. Widgets such as recent posts, social media icons, newsletter signup forms, or custom text widgets are commonly used in footers.
- Drag and Drop the Widget: Click and hold the widget you’ve selected, then drag it over to the Footer Widget Area. Drop the widget into place within the Footer Widget Area.
- Configure the Widget Settings: Once the widget is added to the Footer Widget Area, you can configure its settings according to your preferences. This may include adding titles, inputting content or URLs, adjusting display options, and customizing styles.
- Repeat for Additional Widgets (Optional): If you want to add multiple widgets to your footer, repeat the process by selecting additional widgets from the list and dragging them into the Footer Widget Area.
- Preview and Save Changes: After adding and configuring the desired widgets, preview your website to see how the footer looks with the new widgets. If everything looks good, click the “Save” or “Publish” button to apply the changes to your live website.
By following these steps, you can easily enhance the footer in WordPress websites by adding widgets that provide valuable content and functionality to your visitors.
3. Add a Menu to WordPress Footer:
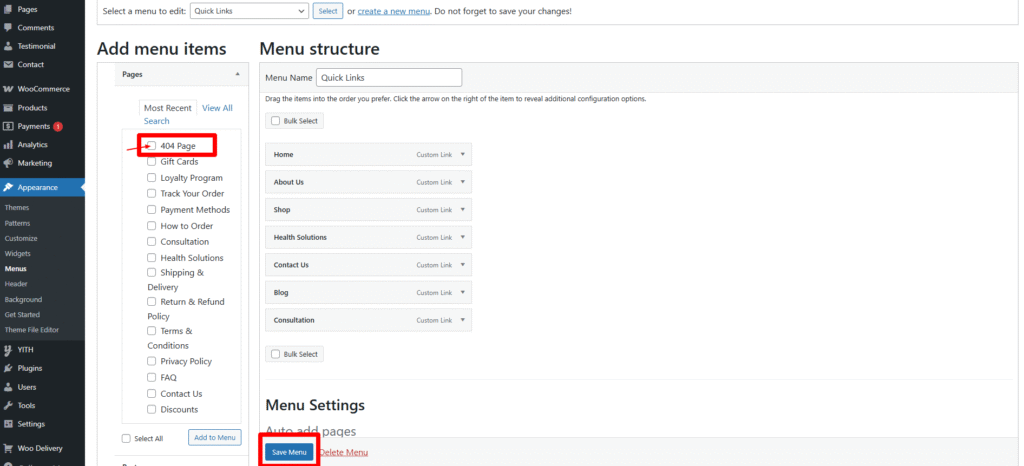
- Access the Menus Page: Log in to your WordPress website dashboard and navigate to “Appearance” > “Menus”.
- Create a New Menu (if necessary): If you haven’t already created a menu for your footer, you can do so by clicking on the “Create a new menu” link. Give your menu a name, such as “Footer Menu”, and click the “Create Menu” button.
- Add Menu Items: Once your menu is created, you can start adding menu items to it. On the left side of the Menus page, you’ll see a list of available pages, posts, custom links, and categories. Check the boxes next to the items you want to add to your footer menu, then click the “Add to Menu” button.
- Organize Menu Items: After adding menu items, you can rearrange their order by dragging and dropping them into place. This allows you to control the sequence in which menu items appear in your footer.
- Assign Menu to Footer Location: Look for the option to assign your menu to the footer location. Depending on your theme, this may be labeled as “Footer Menu”, “Footer Navigation”, or something similar. Check the box next to the footer location where you want to display your menu.
- Save Menu: Once you’ve added and organized your menu items and assigned the menu to the wordpress sidebar menu location, click the “Save Menu” button to apply your changes.
- Preview Your Website: Visit your website to preview how the footer menu looks with the added menu items. Ensure that the menu items are displayed correctly and link to the intended pages or URLs.
By following these steps, you can easily include a navigation menu in the footer in WordPress websites, improving website navigation and enhancing user experience for your visitors.
4. Add An HTML Code Or Script To The Footer:
- Access Theme Editor: Log in to your WordPress dashboard and navigate to “Appearance” > “Theme Editor”.
- Select Footer Template: In the Theme Editor, locate the footer template file. This file is typically named “footer.php” and is located within your theme’s folder structure. Click on it to open the file in the code editor.
- Insert HTML Code or Script: Within the footer template file, find the appropriate location where you want to insert the HTML code or script. This might be just before the closing </body> tag (</body>), which is common for footer content.
- Paste HTML Code or Script: Paste your HTML code or script directly into the footer template file. This could be code for integrating third-party tools, tracking scripts, additional styling elements, or any other custom functionality you wish to add.
- Save Changes: After pasting the HTML code or script, make sure to save the changes you’ve made to the footer template file by clicking the “Update File” button or equivalent option provided by your theme editor.
- Test Your Website: Once saved, visit your website to ensure that the HTML code or script you added to the footer is displaying and functioning as expected. Test any functionality associated with the code or script to verify its proper integration with your website.
- Exercise Caution: When adding HTML code or scripts to your footer, it’s essential to exercise caution to avoid disrupting the functionality of your website. Ensure that the code is properly formatted and does not conflict with existing code. Additionally, be mindful of any security risks associated with third-party scripts and only integrate trusted sources.
By following these steps, you can effectively insert HTML code or scripts into your footer in WordPress websites, allowing for advanced customization and integration of additional functionality on your website.
5. Remove “Powered By WordPress” From The Footer:
- While WordPress is an excellent platform for building websites, some users prefer to remove the default “Powered By WordPress” attribution from the footer for branding purposes. Depending on your theme, this can usually be achieved through theme settings, customization options, or by editing the theme files directly.
Conclusion:
In summary, the footer in WordPress websites serves a crucial function in delivering vital information and enriching user interaction. Employing the aforementioned techniques enables effortless editing and customization of your WordPress footer, ensuring it mirrors your brand identity, enhances navigation, and effectively engages visitors. Whether integrating widgets, menus, or custom code, optimizing your footer enhances the overall professionalism and polish of your website, fostering a positive user experience. As we navigate the digital landscape of 2025 and beyond, dedicating attention to refining your footer ensures your website remains contemporary, functional, and aligned with evolving user expectations.
